星期一, 十月 31, 2005
Install Asterisk in Debian
因為用apt-get install asterisk 後,config file不知道要怎麼設,所以還是follow 書的作法。用cvs 來download。
先到/usr/src下,待會checkout的data會到這裡。
# cd /usr/src接著export cvs需要的variable:
# exports CVSROO=:pserver:anoncvs@cvs.digium.com:/usr/cvsroot接著login cvs server:
# login cvs會出現要求password,輸入" anoncvs ".
可以checkout了,只要作voip,沒有要作trunking,所以checkout asterisk
# cvs checkout asteriskOK,在/usr/src下已經可以看到asterisk這個目錄了。
Compile, Install
# cd asterisk結果:
# make clean
# make install
Error : cannot find ssl大概是沒有libssl(猜的)。用apt-file search libssl 找到libssl-dev,安裝後再make install一次..Success !!
+---- Asterisk Installation Complete -------+做出幾個sample configuration file:
+ +
+ YOU MUST READ THE SECURITY DOCUMENT +
+ +
+ Asterisk has successfully been installed. +
+ If you would like to install the sample +
+ configuration files (overwriting any +
+ existing config files), run: +
+ +
+ make samples +
+ +
+----------------- or ---------------------+
+ +
+ You can go ahead and install the asterisk +
+ program documentation now or later run: +
+ +
+ make progdocs +
+ +
+ **Note** This requires that you have +
+ doxygen installed on your local system +
+-------------------------------------------+
+ +
+ ** NOTE FOR DOWNGRADING FROM CVS HEAD ** +
+ +
+ If you are downgrading from CVS HEAD to +
+ a stable release, remember to delete +
+ everything from your asterisk modules +
+ directory (/usr/lib/asterisk/modules/) +
+ and the asterisk header directory +
+ (/usr/include/asterisk/) +
+ before doing a 'make install'. +
+ +
+-------------------------------------------+
# make samples這會產生一大堆檔案在/etc/asterisk.
啟動:
# asterisk &就會啟動asterisk server ,
要連上一個已經啟動的asterisk server,用
# asterisk -r會 出現asterisk的command line interface:
hostname*CLI>輸入"help"會出現很多message.
CLI> sip debug會顯示detail的sip message (protocol),用
CLI> sip no debug來停止debug輸出。用
CLI> quit結束和asterisk server連線。
Debian : iptables
雖然很久以前就寫過,但是google blog search 搜尋不到,所以還是再寫一次好了:
eth0是ADSL,所以所有從eth0出去的,都做 NAT.
但是因為對內有兩個網路卡,所以沒有指定source ip.
在起動iptables前要enable ip_forward:
# echo 1 > /proc/sys/net/ipv4/ip_forward之後再 load ip_tables modules:
# modprobe ip_tables接著開始設定iptables rules:
# iptables -t nat -A POSTROUTING -o eth0 -j MASQUERADE之後,其他的client就可以把default gateway改為這個主機就可以了。
sshd的配置
加上ADSL,固定ip後,/var/log/auth.log就會有
Oct 31 13:47:53 localhost sshd[19236]: reverse mapping checking getaddrinfo for 82-194-78-76.hospedajeydominios.com failed - POSSIBLE BREAKIN ATTEMPT!這樣的紀錄,真的是很麻煩。
所以想把ssh對外都關掉。
找到/etc/ssh/sshd_config中,有ListenAddress。不設定的話,是對所有的interface, address都收。所以改成
ListenAddress 10.3.2.77因為機器上有兩個有線網卡,一個無線。對內的都要收,所以社兩個ListenAddress,但是不是這樣:
ListenAddress 10.3.5.99
ListenAddress 10.3.2.77 10.3.5.99而是要分開設。所以要寫兩次。
設定後,自己ssh到ADSL的那個address去測試,已經連不通了。
OK
Debian : bash auto competion
今天在moto看到的:
平常用bash最麻煩的就是要打一場串的字。
其實bash有自動填充功能,就是打了幾個字後,就可以用[ TAB ] 鍵,讓bash自動將剩下的字填出來。預設是先找目前目錄下的檔名。
舉例來說:
目前目錄下有
VMWare-player-1.0.0-1691.exe
我要把他co到 ~/share下,可以
$ cp VMW --然後按下[TAB],後面的字就會被填滿自動填充功能設定在/etc/bash_completion,其中決定了search的位置和順序。
$ cp VMWare-player-1.0.0-1691.exe
星期五, 十月 28, 2005
pchome買的耳麥
 還好,
還好,定了之後,兩天就到了
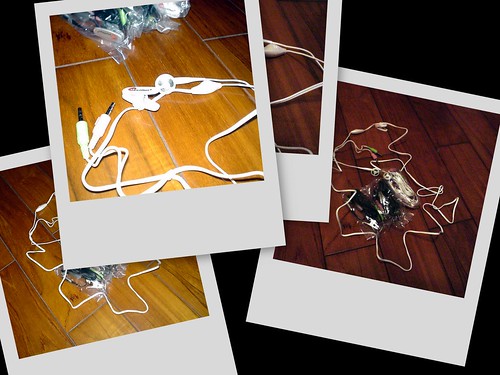
199, 有四組
network device 並不像一般的device,需要在/dev/下有一個node。
network device在driver module load到kernel後,就會自動在kernel中產生一個device node。(所以外面看不到?)
所以network device第一件事就是load module : modprobe。
接著就是用ifconfig來設定network的data : ip address, netmask, gateway... etc.
談成功的產品規劃
ThinStation : ThinClinet LiveCD
http://thinstation.sourceforge.net/wiki/index.php/ThIndex
http://molesterwaterball.blogspot.com/2005_01_01_molesterwaterball_archive.html
( ̄▽ ̄)  ̄□ ̄||| ˋ(′~‵")ˊ o(_ _o ) f(-_-)> ( ( ̄▽ ̄))
( ̄□ ̄|||) ╮(─_─)╭ ( ̄▽ ̄)ノ (_ _ )/~~ ˋ(ー_ー )ˊ
( ′-`)y-~ m(-_-)m -_-凸
星期四, 十月 27, 2005
DWL 122 Debian : linux-wlan-ng-0.2.1-pre26 install from source
從sourcecode來安裝linux-wlan-ng-0.2.1-pre26
# apt-get install kernel-package debhelper kernel-headers-2.6.8-2-386header和source版本要follow你kernel的版本:
# uname -a會顯示目前kernel的版本。
接著到linux-wlan-ng-0.2.1-pre26下作build process
# make config會問一些問題,可以讀README的內容了界問題的內容。
有一點: 他需要kernel-source,但是不是真正的source,而是compile module需要的source,他會自己找,好像是
Module install directory [/lib/modules/2.6.8-2-386]:完成後
# make all
# sudo make install
修改wlan的config : 這一點不太實用...因為要自己找到AP SSID。
假設SSID是"10.3.3.205 - 3F",沒有WEPP key。
就把/etc/wlan/wlan-DEFAULT copy 並 rename 一下:
# cp wlancfg-DEFAULT "wlancfg-10.3.3.5 - 3F"
然後修改wlan.conf最後:
SSID_wlan0="10.3.3.10 - 3F"插入DWL-122就可以。
可以demsg看看有沒有load module : prism2_usb, p80211 usb_core的message。
也可以順便查看一下有沒有error message
然後用
#ifconfig -a看看有沒有列出一個wlan0的network interface..
跟一般的service一樣,start, stop script在/etc/init.d/wlan,可以用
# /etc/init.d/wlan stop來停止配合 ifconfig -a 可以看看wlan0 起來和停止的狀態
start 開啟
改wlan.cfg的作法也可以用:
#wlanctl-ng wlan0 lnxreq_ifstate ifstate=enable可以加入AP
#wlanctl-ng wlan0 lnxreq_autojoin ssid="10.3.3.205 - 3F" authtype=opensystem
以上只是interface起來而已,還沒規劃network..
network的規劃還是用ifconfig
# ifconfig wlan9 10.3.5.100 netmask 255.255.252.0 broadcast 10.3.1.15
Some Links abut SER
http://www.mit.edu/afs/athena/project/sip/sip.edu/ser.shtml
http://www.voip-info.org/wiki-SIP+Express+Router
Debain : linux-wlan-ng 為了dwl 122 usb wifi
#apt-get install linux-wlan-ng是從 "unstable" download的, kernel image被upgrade到2.6.12....
The following NEW packages will be automatically installed:
linux-image-2.6.12-1-386 linux-wlan-ng-doc
linux-wlan-ng-modules-2.6.12-1-386 wireless-tools
The following packages have been kept back:
libnspr4 libnss3 mozilla-browser mozilla-psm
The following NEW packages will be installed:
linux-image-2.6.12-1-386 linux-wlan-ng linux-wlan-ng-doc
linux-wlan-ng-modules-2.6.12-1-386 wireless-tools
Get:1 ftp://ftp.us.debian.org unstable/main linux-image-2.6.12-1-386 2.6.12-10 [15.8MB]重開機,多了一個boot image。選2.6.12的version boot進去後。
Get:2 ftp://ftp.us.debian.org unstable/main linux-wlan-ng 0.2.2+dfsg-3 [127kB]
Get:3 ftp://ftp.us.debian.org unstable/main linux-wlan-ng-doc 0.2.2+dfsg-3 [80.7kB]
Get:4 ftp://ftp.us.debian.org unstable/main linux-wlan-ng-modules-2.6.12-1-386 0.2.2+dfsg-3 [197kB]
Fetched 16.2MB in 6m4s (44.6kB/s)
Selecting previously deselected package linux-image-2.6.12-1-386.
(Reading database ... 91790 files and directories currently installed.)
Unpacking linux-image-2.6.12-1-386 (from .../linux-image-2.6.12-1-386_2.6.12-10_i386.deb) ...
Selecting previously deselected package wireless-tools.
Unpacking wireless-tools (from .../wireless-tools_27-2_i386.deb) ...
Selecting previously deselected package linux-wlan-ng.
Unpacking linux-wlan-ng (from .../linux-wlan-ng_0.2.2+dfsg-3_i386.deb) ...
Selecting previously deselected package linux-wlan-ng-doc.
Unpacking linux-wlan-ng-doc (from .../linux-wlan-ng-doc_0.2.2+dfsg-3_all.deb) ...
Selecting previously deselected package linux-wlan-ng-modules-2.6.12-1-386.
Unpacking linux-wlan-ng-modules-2.6.12-1-386 (from .../linux-wlan-ng-modules-2.6.12-1-386_0.2.2+dfsg-3_i386.deb) ...
Setting up linux-image-2.6.12-1-386 (2.6.12-10) ...
WARNING: Loop detected: /lib/modules/2.6.12-1-386/linux-wlan-ng/p80211.ko which needs p80211.ko again!
WARNING: Module /lib/modules/2.6.12-1-386/linux-wlan-ng/p80211.ko ignored, due to loop
WARNING: Module /lib/modules/2.6.12-1-386/linux-wlan-ng/prism2_usb.ko ignored, due to loop
WARNING: Module /lib/modules/2.6.12-1-386/linux-wlan-ng/prism2_plx.ko ignored, due to loop
WARNING: Module /lib/modules/2.6.12-1-386/linux-wlan-ng/prism2_pci.ko ignored, due to loop
WARNING: Module /lib/modules/2.6.12-1-386/linux-wlan-ng/prism2_cs.ko ignored, due to loop
Searching for GRUB installation directory ... found: /boot/grub .
Testing for an existing GRUB menu.list file... found: /boot/grub/menu.lst .
Searching for splash image... none found, skipping...
Found kernel: /boot/vmlinuz-2.6.12-1-386
Found kernel: /boot/vmlinuz-2.6.8-2-386
Updating /boot/grub/menu.lst ... done
Setting up wireless-tools (27-2) ...
Setting up linux-wlan-ng (0.2.2+dfsg-3) ...
Setting up linux-wlan-ng-doc (0.2.2+dfsg-3) ...
Setting up linux-wlan-ng-modules-2.6.12-1-386 (0.2.2+dfsg-3) ...
Reading Package Lists... Done
Building Dependency Tree
Reading extended state information
Initializing package states... Done
Reading task descriptions... Done
modify /etc/modules.conf 加入
alias wlan0 prism2_usb執行update-modules,出現warnning : loop detected XXXXXX。
所以之後用modprobe 都無法load prism2_usb module。
google一下,發現是
Debian : NFS Server
NFS Server在Debian中要安裝
#apt-get install nfs-common portmap nfs-kernel-server安裝完後,因為沒有設定好exports檔,所以最後會有
No starting NFS kernel daemon : No exports接下來就要設定export檔。
create一個/etc/exports 檔,作為nfs server的設定檔。
以 /nfsroot 為分享的folder為例:
/nfsroot 10.3.2.240(rw)將nfsroot開放給10.2.3.240這個host。可以作read/write。
啟動nfs server (nfs-kernel-server)之前要啟動portmap
#portmap之後再啟動 server
#/etc/init.d/nfs-kernel-server start可以用showmount來檢查:
#showmount -eOK
Export list for xxxxxxx:
/nfsroot 10.3.2.240
Client端,也要安裝nfs-common portmap
#apt-get install nfs-common portmap安裝完後,執行portmap之後就可以mount
#portmap10.3.2.xxx是nfs server的ip,remote是local的directory。
#mount 10.3.2.xxx:/nfsroot remote
要注意folder權限的問題。
星期三, 十月 26, 2005
一些測試的問題:VOIP Phone
測試方式:與PC端互call,使用SER作SIP Proxy, registrator。PC端run X-Lite
- 掛斷動作似乎無法傳到X-Lite (用X-Lite互call則ok,所以應該不是SER的問題)。
- 不知道怎麼撥號,只能接。
- 經過Bridge後的device似乎ping不到(尚未確認是不是device的問題)。
因為有點麻煩,所以紀錄一下:SER 的tutorial
每次要download都要用email註冊一次。所以還是把link記下來好了。
iperf : 網路performance測試軟體
測試網路,兩端都要run,一個run client,一個run server mode。
支援windows, linux, OS X,....
...google一下就有很多,簡單的測試 大概是(以Windows : Server, Linux Client為例)
Windows端
iperf -sLinux端
iperf -c 10.3.5.xxx10.3.5.xxx是Windows的ip,command的意思是測試到10.3.5.xxx間的 performance。等一下後,linux端就會輸出
---------------------------------- --------------------------
Client connecting to 10.3.5.XX, TCP port 5001
TCP window size: 16.0 KByte (default)
------------------------------------------------------------
[  3] local 10.3.2.XXX port 32784 connected with 10.3.5.196 port 5001
[  3]  0.0-10.0 sec  4.86 MBytes  4.07 Mbits/sec
Minicom : Linux 的hyperterminal
minicom啟動後會尋找config file,自動起始com port 初始化。
參數的設定用 ^-A Z叫出 pop up help。
依照help檔中的key 來動作。
記得改完參數後要 " Save as dl" - save as default。
使用Q 退出(不必reset)。
之後再啟動時,就會依照剛剛save的config內容來啟動。
( 所以單純的改完com port setting並沒有效,要save 重啟動後才有效)。
每次啟動minicom,minicom都會送出Modem control command (AT command),這個不知道要怎樣消除。
minicom可以用作設定/dev/ttyS?的工具(user mode的ioctl)。
對/dev/ttyS?的動作都會從com port輸出,可以用這個方法來傳送檔案。
但是因為/dev/ttyS?沒有提供comm parameter的設定方法,所以可以利用minicom來configure comport,再"不reset 退出",com port就會留在configure後的mode。
之後就可以對/dev/ttyS?操作直接輸出了
舉例來說, 使用9600,8N1,送出uuencode的file出去:
# minicom (進入後設定9600,8N1後退出(Q))
# uuencode fileA dummyname > /dev/ttyS0
星期二, 十月 25, 2005
IP Phone : WAN/LAN Bridge Function
IP Phone 提供WAN, LAN兩個RJ45接頭,主要是提供brideg功能,讓user不用再買一個hub。
可以將IP Phone接到任意已存在的網路連線設備中。
Post from Flock
這是從Flock上po的,試試看結果如何。
可惜沒有html mode。
Post from Flock
這是從Flock上po的,試試看結果如何。
可惜沒有html mode。
星期一, 十月 24, 2005
Debian : apt-file 找程式在那一個package中
Jerry在build中出現
bzcat : command not found!所以要找該安裝的package是甚麼。
用
# apt-cache search bzcat找不到`。因為bzcat是bzip2 package中的其中一個command,但是要怎樣才能知道實際上要安裝的是bzip2呢?就要用apt-find命令
# apt-find search bzcat這樣就知道是要安裝bzip2這個package了。
bzip2 : /usr/bin/bzcat
bzip2 : /usr/share/man/man1/bzcat.1.gz
....
...
但是apt-find這個command也是要安裝才有喔
# apt-get install apt-file裝玩後也要
#apt-file update才可以用。
申請SIP number
到freeworldialup 申請。
號碼是: ....去gmail看。
不知名的uclinx-dev distribution
提供arm utils和kernel和root fs。
kernel是uclinux,但是沒有用uclinux的buildroot包裝,另外包裝一個config,提供設定。
make command會出現prompt。
依照prompt內容依次make target。
要注意的是,在make完toolchain後,要自己執行另外兩個shell script設定toolchain path和kernel path。
* ' source' command用在tcsh中,bash用 ' . ' 就可以,功用是不管file的attrib是否可執行,都執行他。
*之後在make所有其他project前都要run這兩個script。
所有targe依次make後,產生romfs和kernel,downlaod到target board上就可以run了。
* config中也可以設定 root fs: nfs,ext2或是romfs。
基
本的configuration在選定board後,會有一些基本的設定,有些board沒有辦法選擇rootfs的type。在 armutils
(linux kernel + crosstool + uclibc + rootfs(busybox)) 下的config.in
可以看到一些board/option的dependency。
廠商的library(module)是以另外的package方式提供,build前要設定好build-environment和kernel source位置,build出來後就是.o 和一些sample application。
因為一些module不是GPL,所以只能用module的方式,啟動後再load,不能和kernel static link在一起。在load module時,會出現version violation 的prompt。
boot-loader的source code(GPL)也附在這個package中。
因為這個board沒有jtag,但是有兩個flash,利用jump切換這兩個flash來開機,作燒錄(另一個flash)的動作。
-------所以這兩個flash是chip suport,並不是用jumper 來enable/disable flash。
Debian : 將安裝光碟co到hd中.
。因為Sarge cd11,12竟然不能讀(但是在其他p上又ok),所以想利用另一台pc將cd11,12的資料co到debian的hd中。
co 完後,在/etc/apt/sources.list中加入co過去的目錄:
deb file:/sargecd/cd11 stable main contrib non-free但是apt-get update卻出現找不到的情況。
deb file:/sargecd/cd12 stable main contrib non-free
follow找不到的path,發現co過去的cd內容,沒辦法把symbolic link也co過去,導致symbolic link變成file。
sargecd的內容 /cd/dists中,有frozen,sarge,stable,testing,unstable。
其中只有sarge有內容,其他的folder都是symbolic link到這個目錄。
所 以手動產生symbolic link後再做apt-get update後就OK。
cdrom要加入sources.list的話,藥用
# apt-cdrom add然後一個一個的把cdrom放進去。
所以一旦改過sources.list,把原來的cdrom source path comment掉後,又run過apt-get update。要再將cdrom 加回去,就要一個一個cdrom加進去。
星期六, 十月 22, 2005
Sharp GX31 : 100萬CCD, SD, CG-Silicon Yahoo 11388. (ebay 9800)
Mitsubish M790i : 200萬CCD, mini-SD, Pchome 12999
pchome 買的HD : Seagate 120G
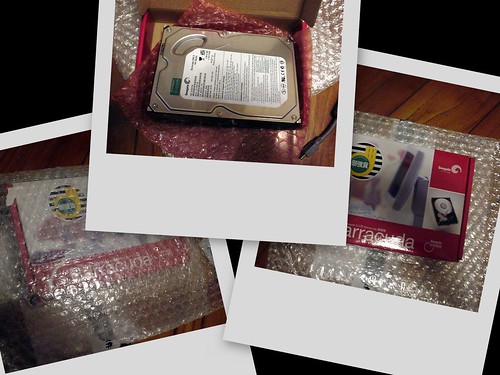
因為爸爸的80G用完了。
.... 沒附螺絲.. Q___Q
mitac M772 壞掉了
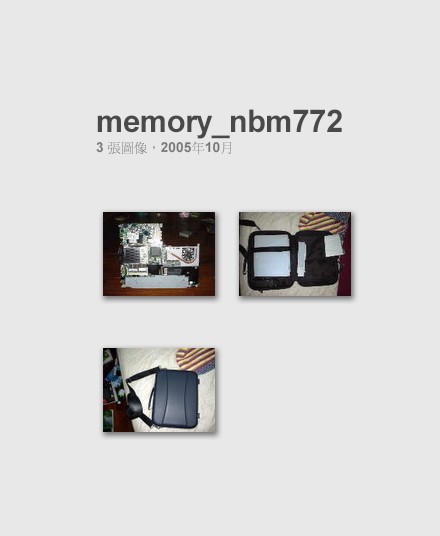
用了5年的NB壞掉了,奇怪。operation led一直亮著,Reset也沒效,fan也不會動。
不知道ˋ什麼問題。
只好把他都收起來。可憐的M772
燦坤買的power supply : 370W
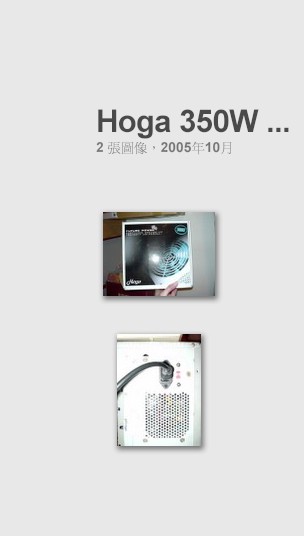
不知道是什麼牌子,370W,NT 990。
白色的。
先前那一台pc壞掉,原來是power supply的風扇壞掉。
pchome 買的DVD-RW
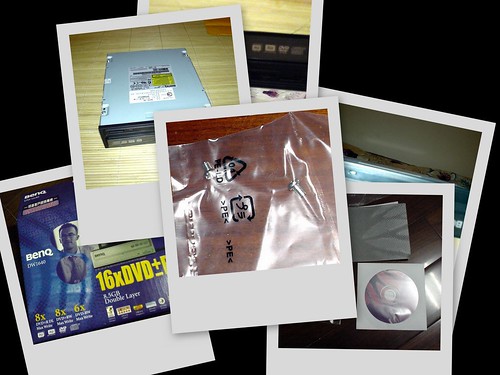
1688元。
奇怪的是,只有附2個螺絲。
上次買pchome的hd也是,沒有附螺絲。
...現在 買這東西都不附螺絲了嗎?
星期五, 十月 21, 2005
tar 備份
$ tar -cvf backupname.tar directory將directory的資料都tar起來到backupname.tar。
CMOS Image Sensor Backend : 義統
好像是義隆的子公司?
有CMOS Image Sensor的backend IC,主要是作P-Cam,但是有提供uP interface,
但是white balance & Gain control都要由pc端來作,
所以不適合用在standalone的產品上(雖然網頁上有reference)。
聯絡人:
03-6661766
陶先生 ext 1650
新酷音
安裝了新酷音,好像不錯,都不會錯。
標點符號也都ok,中英混打呢?
喔!也是用shift key。
超好,打到現在都沒錯,看來以後藥用(喔,錯了)新酷音。
安裝了新庫殷,好像不錯,都不會錯。
標點符號也都ok,中英混打呢?
喔!也是用shift key。
抄好,打到現在都沒錯,看來以後要用(喔,對了)新庫殷。
試用了一個小時候,就把微軟新注音移除了。
星期四, 十月 20, 2005
爛人的結婚帖
收到爛人的帖子了

不錯喔,新娘子還蠻美的,新郎官就不多評論了...

因為他個性不喜張揚(據他自己所述),只有發給少數(也就是桃園以南,南投以北)的幾個同學。不想麻煩大家。
因為他個性不喜張揚(據他自己所述),只有發給少數(也就是桃園以南,南投以北)的幾個同學。不想麻煩大家。
所以我也就沒把日期和地點寫出來,免得造成困擾(或是應該要寫出來,才不會造成困擾?)。
祝福他婚後能夠洗心革面,重新做人(????) 。
-------喔,是好好”做人”`。
繞了一圈又回來:SER install
原來install SER,說要libc6 version > 2.3.? 但是sarge版本太低,又不想upgrade到testing或unstable,所以想install vserver,在vserver裡upgrade libc6再裝。
結果instal vserver時,使用 -t unstable 安裝部分module導致libc6也upgrade了,
既然如此,就直接裝SER算了....
follow SER的install how-to,install SER core ok,安裝suggest module時,說libxml2 version太低。這時候已經知道,就用 -t unstable 作部分升級。升級後安裝所有module OK。
結果OK。
follow document說,debian的script一樣是在 /etc/init.d/ser。一樣是start, stop, restart..
控制用serctl
# setctl moni就會出現文字模式的monitor data。
測試的client端可以用soft-phone....但是都找不到可以自己設sip server的softphone..
在moto討論區上的一些sources.list內容...
每次都要重新找一次,所以把他記下來...
deb http://debian.linux.org.tw/debian/ stable main non-free contrib
deb-src http://debian.linux.org.tw/debian/ stable main non-free contrib
deb http://debian.linux.org.tw/debian/ testing main non-free contrib
deb-src http://debian.linux.org.tw/debian/ testing main non-free contrib
deb http://security.debian.org/ stable/updates main contrib non-free
deb http://debian.linux.org.tw/pub/kde/stable/3.2/Debian stable main
deb ftp://ftp.us.debian.org/debian/ unstable main non-free contrib
deb-src ftp://ftp.us.debian.org/debian/ unstable main non-free contrib
deb http://linux.cdpa.nsysu.edu.tw/debian stable main
deb-src http://linux.cdpa.nsysu.edu.tw/debian stable main
deb http://ftp.debian.org/debian testing main contrib non-free
deb-src http://ftp.debian.org/debian testing main contrib non-free
deb http://security.debian.org/ testing/updates main
deb ftp://ftp.us.debian.org/debian/ testing main non-free contrib
deb-src ftp://ftp.us.debian.org/debian/ testing main non-free contrib
deb http://non-us.debian.org/debian-non-US testing/non-US main contrib non-free
deb-src http://non-us.debian.org/debian-non-US testing/non-US main contrib non-free
deb ftp://ftp.us.debian.org/debian/ stable main non-free contrib
deb-src
全站熱搜

 留言列表
留言列表
 留言列表
留言列表發表留言

